
Run a report (overview of the Reports section)
The Reports section is where you generate every report in TenantLedger — financial statements, rent rolls, tenant and lease activity, vendor lists, communications, and more. You don’t create or delete reports; you open a report, choose a few filters, and TenantLedger reads your existing data and produces the result on screen.
Almost every report follows the same three-step rhythm: open the report → choose filters → click Submit. Once you’ve run one report, you know how to run them all. This article explains that shared flow and what each common filter does; the report-specific articles linked at the bottom cover how to read each individual report.
When to use it
- Month-end or year-end: pull a Cash Flow report or Balance Sheet for your books or your accountant.
- Chasing money: run the A/R Aging (delinquency) report to see who’s behind.
- Reviewing a single tenant or lease: run a Tenant Statement.
- Planning ahead: run the recurring-schedule reports to forecast upcoming charges and bills.
- Tax time: run the Vendor Report to gather contractor details for 1099s.
Before you start
- None. Reports read the data you’ve already entered — payments received, bills paid, leases, charges, vendors — so the more complete and up to date your records, the more useful each report will be. A report never changes your data; it only reads it.
Steps
-
In the left sidebar, click Reports.
-
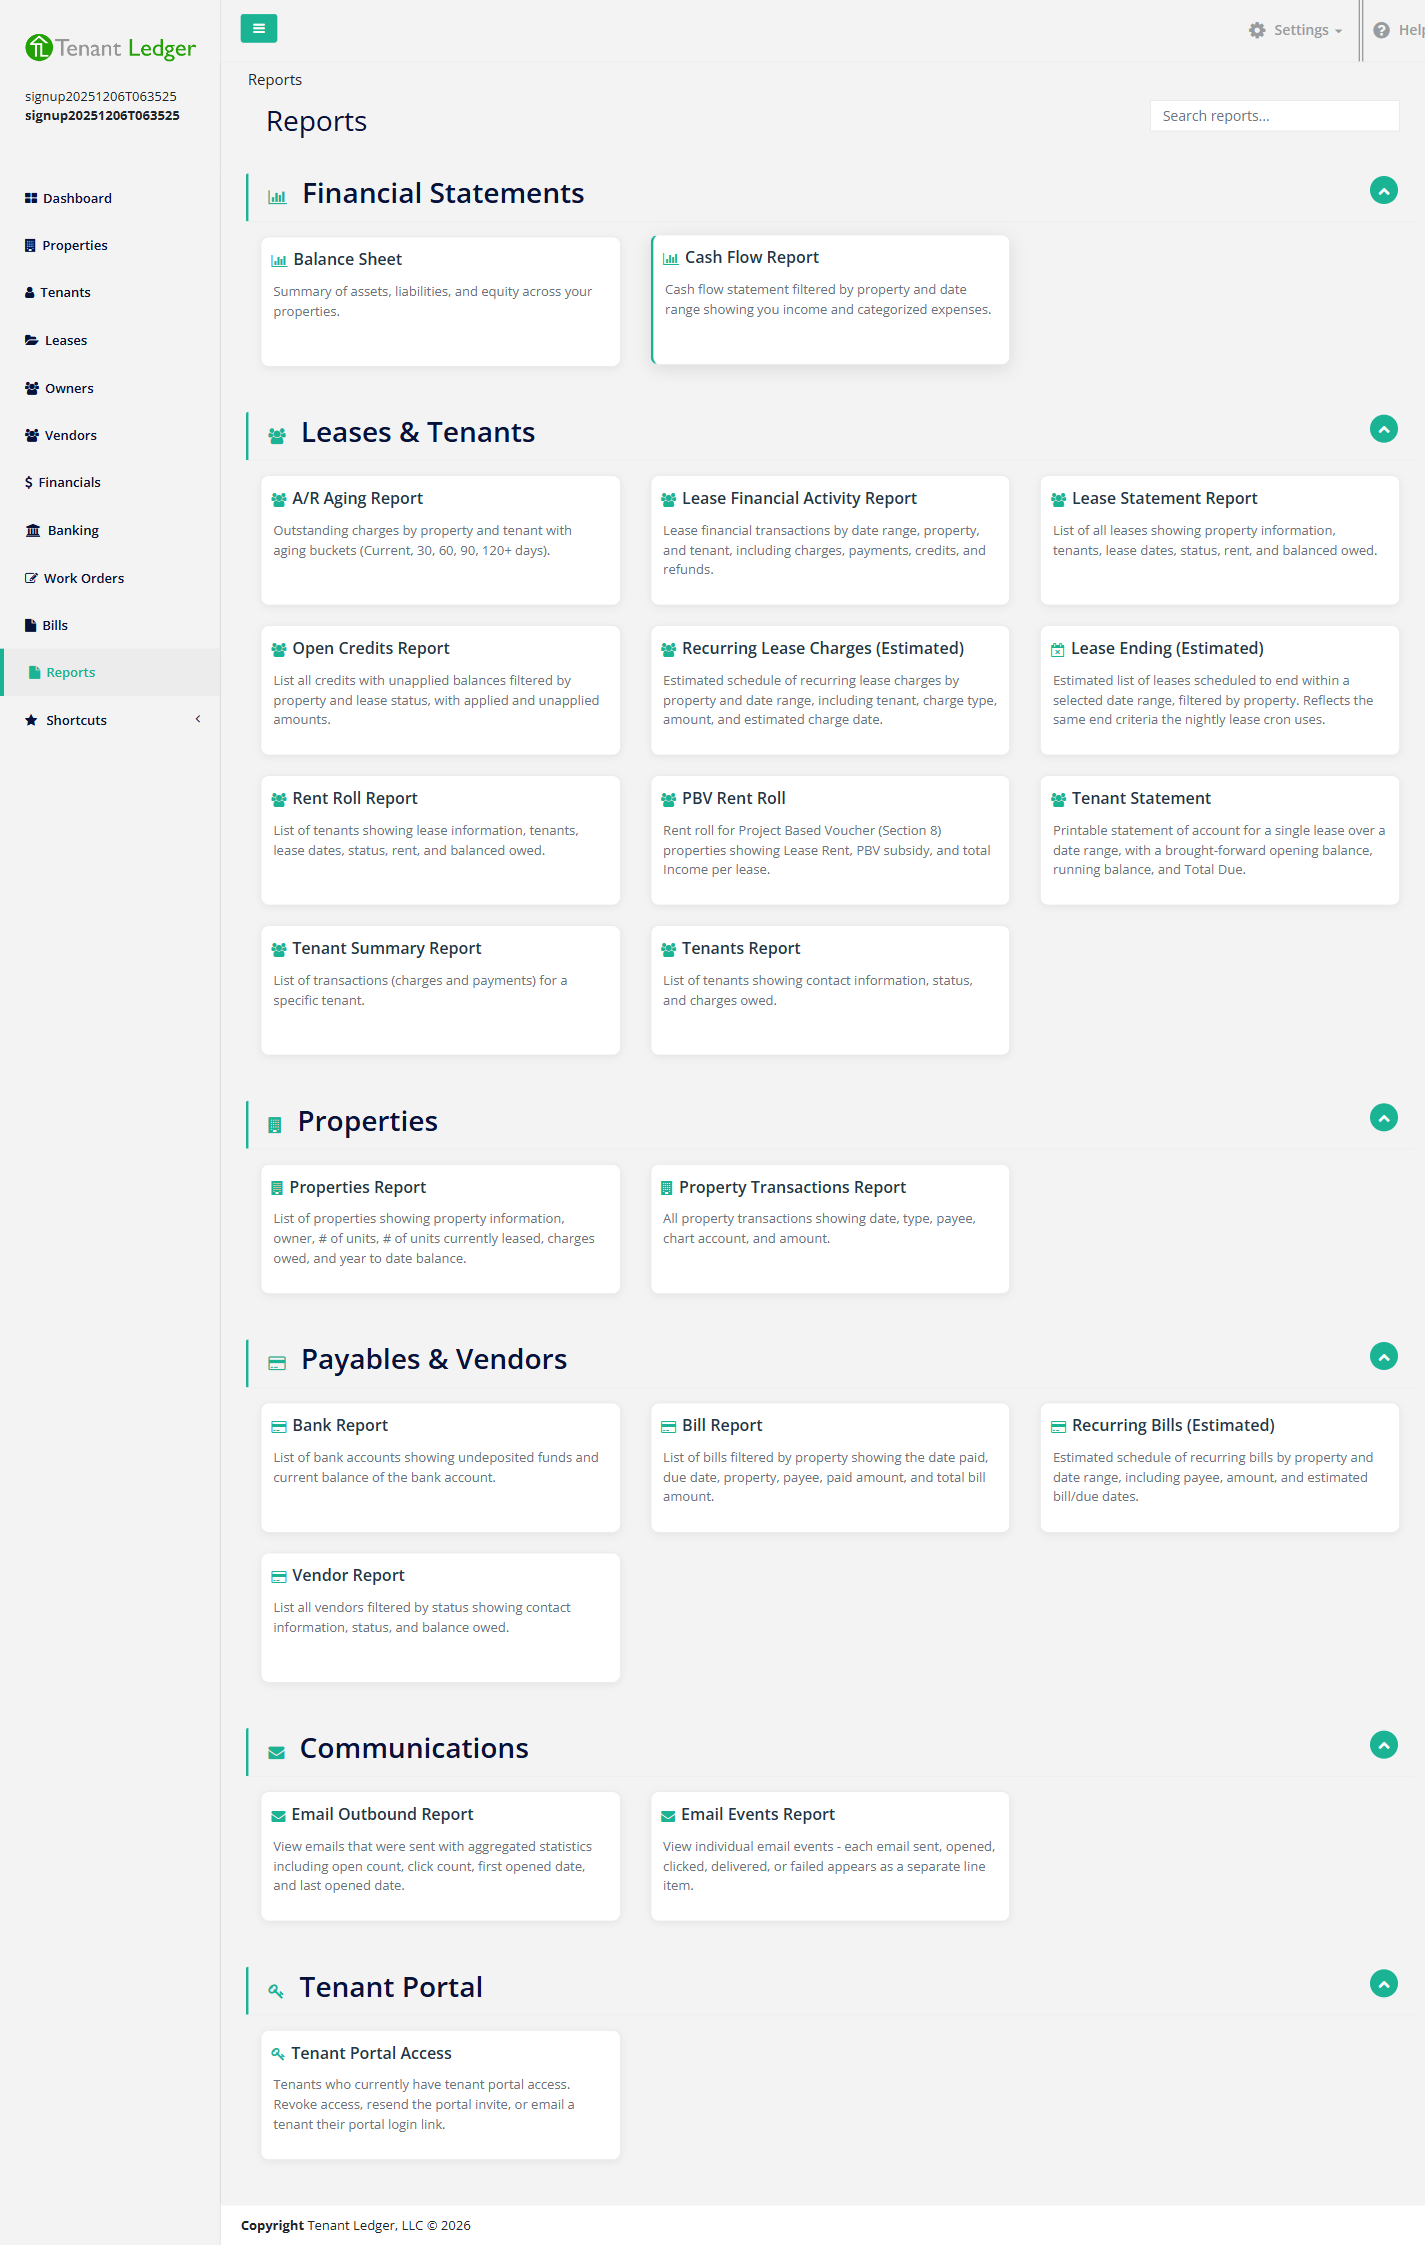
Find the report you want. Reports are grouped into collapsible categories:
- Financial Statements — Balance Sheet and Cash Flow.
- Leases & Tenants — Rent Roll, Tenant Statement, A/R Aging, open credits, recurring lease charges, leases ending, and more.
- Properties — property lists and property transactions.
- Payables & Vendors — Bill Report, Bank Report, Recurring Bills (Estimated), and the Vendor Report.
- Communications — email delivery reports (Outbound and Events).
- Tenant Portal — who has portal access.
-
(Optional) Type a keyword in the Search reports box at the top right to filter the list down to matching report names. Click a category’s chevron arrow to collapse or expand that group and keep the page tidy.
-
Click the report’s name to open it. The report’s filter form appears.
-
Choose the filters the report asks for. These vary by report, but the common ones behave consistently:
- Property — pick a single property to scope the report to it, or choose All to combine every property into one result. Some reports offer an Owner selector that filters the property list to that owner’s portfolio first.
- Company — a few company-wide reports (such as the Balance Sheet) run against your whole company rather than one property, so you pick your company name here.
- Date range (often labelled Range select with from and to boxes) — sets the period the report covers. It defaults to a sensible window (often the last twelve months, the current month, or the next month, depending on the report). Adjust it to match the period you care about.
- As-of date — used by point-in-time reports (such as A/R Aging) instead of a range; it’s the single date you want balances calculated against.
- Status filters — many reports let you narrow by Lease Status (Active, Future, Terminated, All), Tenant Status (Active, Inactive, Potential, All), or Vendor Status (Active, Inactive, All). The default is usually Active, so switch to All when you also want ended or inactive records.
-
Click Submit to generate the report.
What you’ll see
After you submit, the results appear on screen.
- List-style reports (Rent Roll, Vendor Report, A/R Aging, recurring schedules, email reports) show a sortable, searchable table. Click a column heading to sort; type in the search box to filter the rows.
- Financial statements (Cash Flow, Balance Sheet) show formatted sections and totals rather than a flat table.
- Statements (Tenant Statement) show a printable, document-style page.
You can print any report with your browser’s print command (Ctrl+P / Cmd+P). A few reports — notably the A/R Aging report — also offer a dedicated Download PDF button that produces a tidy, dated file named with your company and the report date.
Tips
- A red asterisk (*) next to a filter means it’s required. Many filters include an All option so you can run the report across every property, owner, or status at once.
- If a report comes back empty, widen the date range and switch any status filter to All — the most common reason for “nothing here” is a filter excluding the records you’re looking for (for example, balances on a terminated lease while the filter is set to Active).
- Reports always reflect your data at the moment you click Submit. Run the report again after you record new payments or bills to see the change.
Related articles
Still stuck? Email support@tenantledger.com and a real person who knows the product will help.