
Add a property
What this is
A property is the building or location you manage — for example, an apartment building, a duplex, or a single-family rental home. The property is the top of everything you track in TenantLedger: once a property exists, you can add its units, attach leases, record charges and payments, log bills and work orders, and run reports for it.
When to use it: Add a property whenever you take on a new building to manage, or when you’re first setting up your account. This is the first step before anything else — you can’t create a unit or a lease until the property it belongs to exists.
Before you start
- You need at least one owner on file. The property form requires you to choose an owner (also shown as “Landlord”). You can add an owner right from the property form if you don’t have one yet (see step 4).
- Optionally, have a bank account ready so deposits and payments for this property are tracked to the right account. You can also add a bank account from the form, or leave it blank for now and set it later.
Steps
-
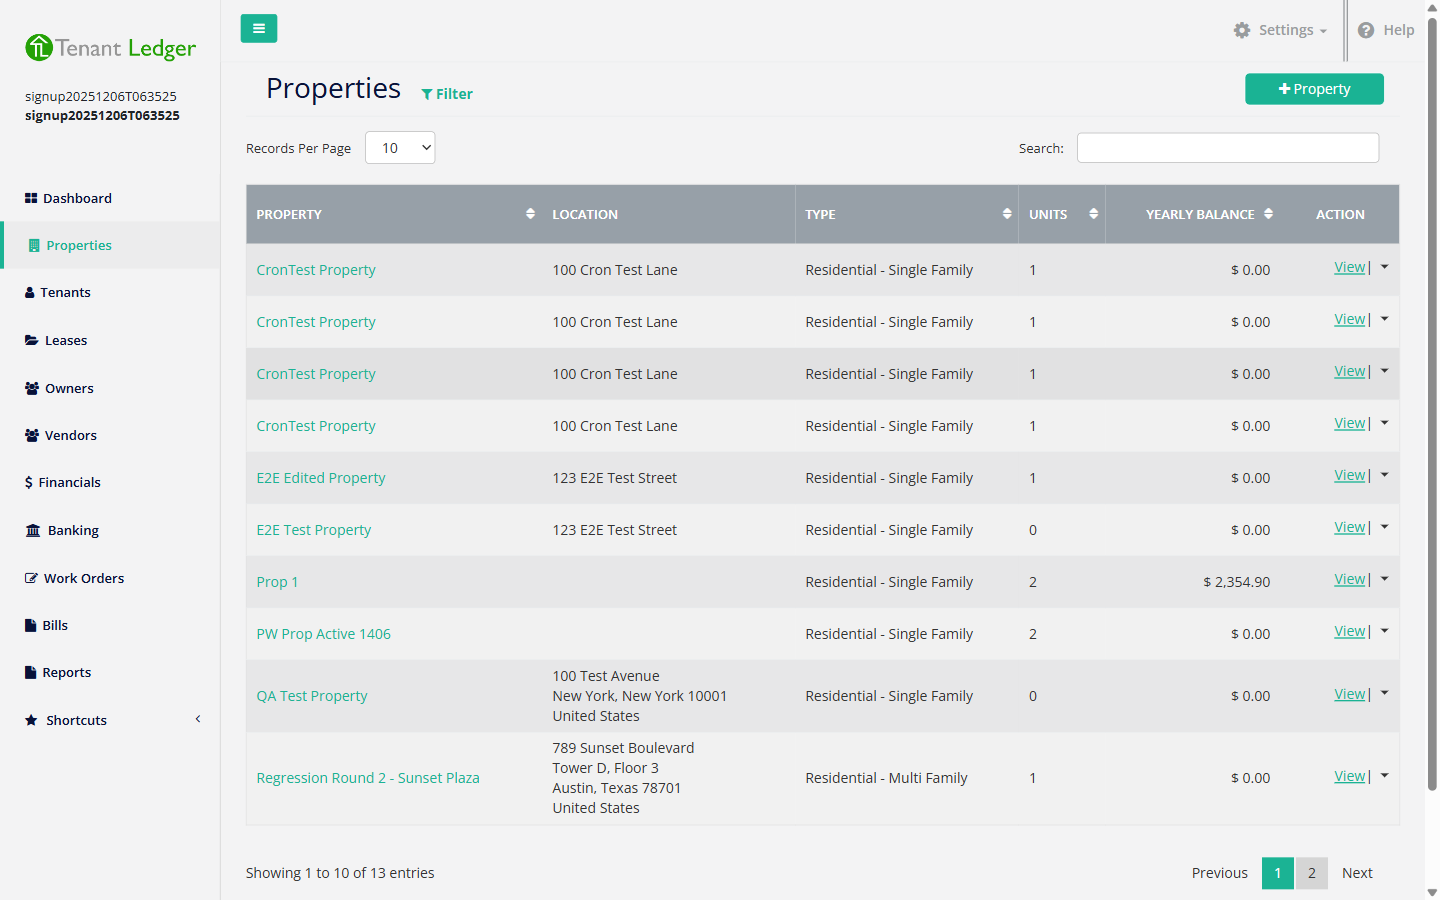
In the left sidebar, click Properties.
-
Click the Property button (the “+ Property” button at the top of the list). You can also use Shortcuts > Add Property in the sidebar.
-
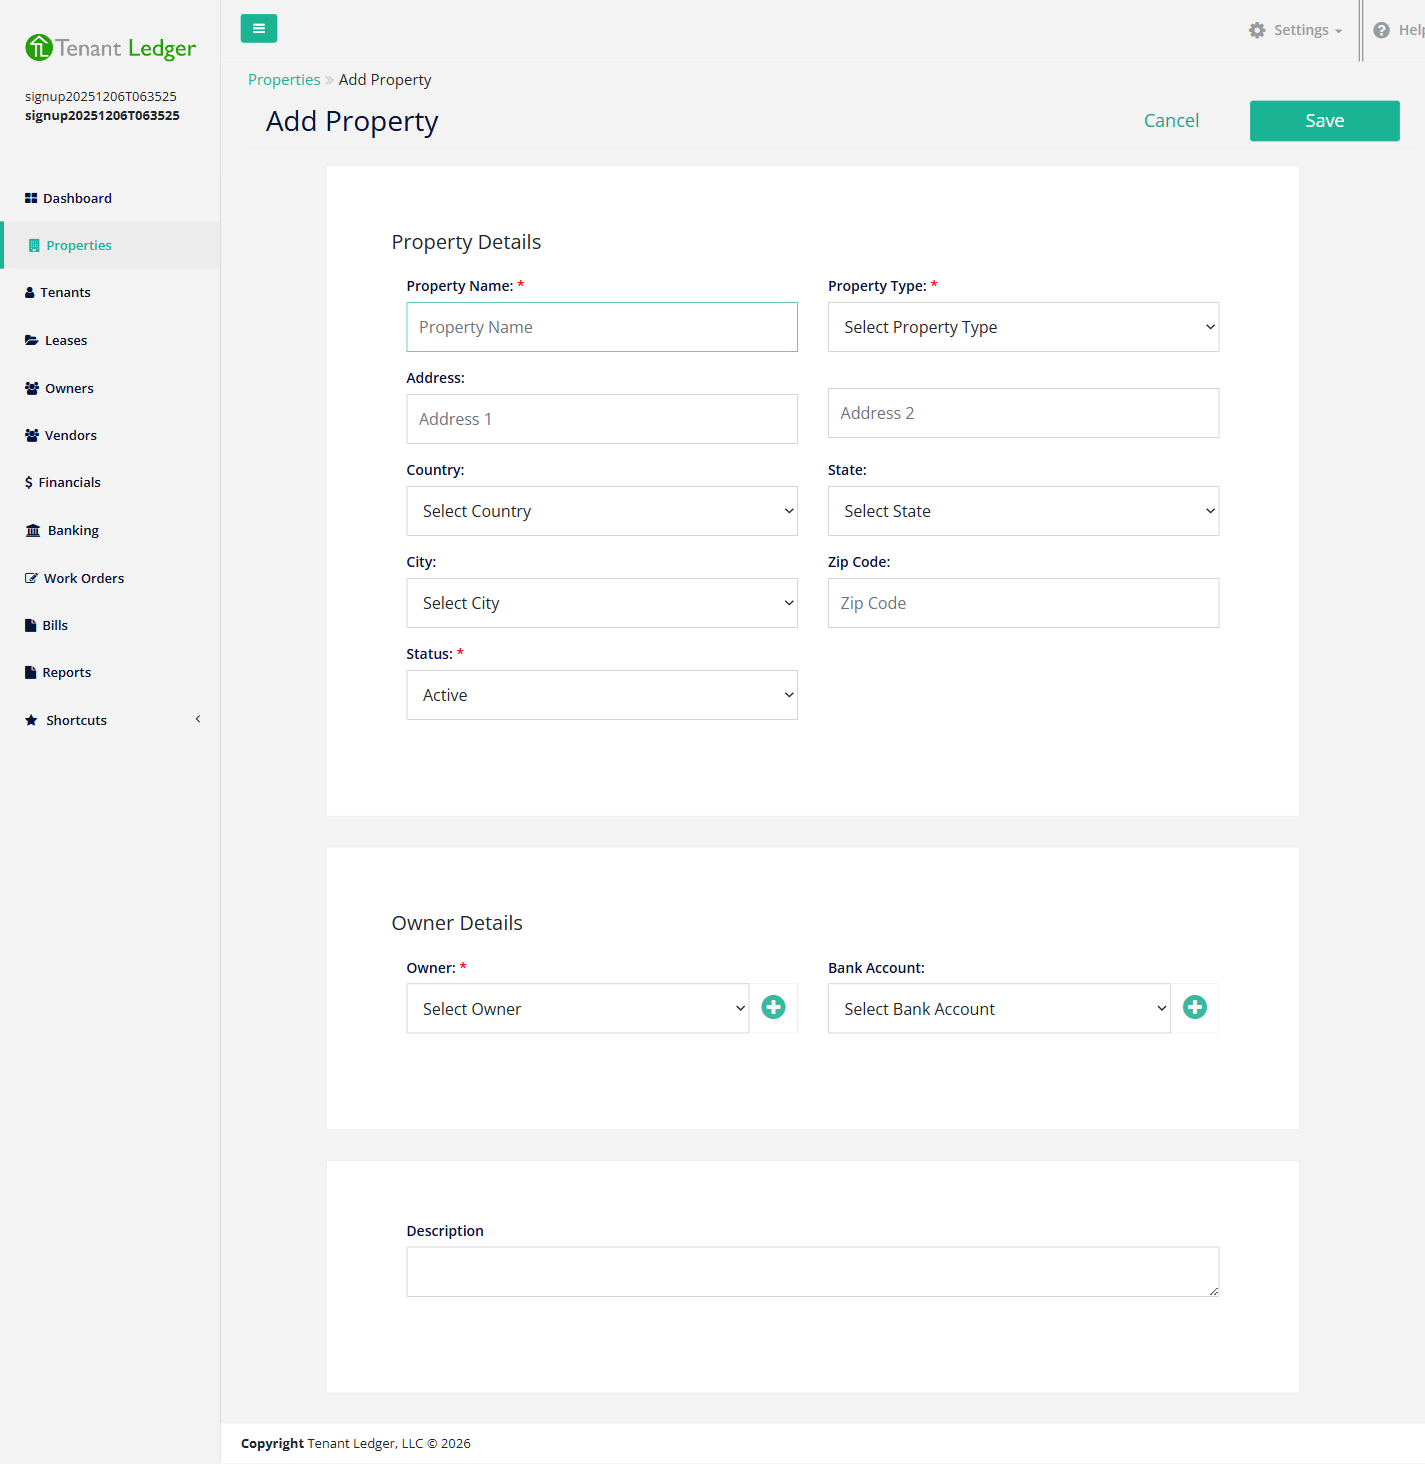
Fill in the Property Details:
- Property Name (required) — the name you’ll see everywhere this property appears (leases, charges, reports). Use something clear and consistent, for example “Riverside Apartments”.
- Property Type (required) — choose from the dropdown (for example, Residential or Commercial). This helps categorize the property; pick whichever best fits the building.
- Address — the street address. Type it in the address field.
- Country, State, and City — these dropdowns cascade: choose the country first, and the state list fills in; choose the state, and the city list fills in. Pick them in that order or the lists below will stay empty.
- Zip Code — the postal code for the address.
- Status (required) — choose Active for a property you currently manage, or Inactive for one you’ve stopped managing but want to keep on record. Leave this on Active for new properties.
-
Fill in the Owner Details:
- Owner (required) — pick the owner (landlord) from the dropdown. This is who the property’s income and expenses roll up to on owner reports and in the Owner Portal. To add a new owner without leaving the page, click the + (plus) icon next to the dropdown, fill in the owner’s name and details in the pop-up, and save — the new owner is selected automatically.
- Bank Account (optional) — pick the account where this property’s deposits and payments are tracked. To add a bank account on the fly, click the + icon next to the dropdown. You can leave this blank and set it later by editing the property.
-
(Optional) Add a Description to note anything helpful about the property — access codes, parking notes, or anything your team should know.
-
Click Save at the top right.
What you’ll see
After you save, you land on the property’s Summary page with a green confirmation message inviting you to add units. The property now appears in your Properties list and in the owner/property dropdowns elsewhere in the app.
Tips
- The property name is how the property appears throughout the app, so use a clear, consistent name from the start — renaming later is possible but the original shows on anything already created.
- Right after adding the property, add its units so you can attach leases. See Add units to a property.
Related articles
Still stuck? Email support@tenantledger.com and a real person who knows the product will help.