
Add a sub-account under a Chart of Accounts account
A sub-account nests one account under another so related items group together, for example “Repairs” as the parent with “Plumbing” and “Electrical” beneath it. Sub-accounts keep your reports tidy without creating a long flat list.
Before you start
- Make sure the parent account already exists. If it doesn’t, add it first — see Set up your Chart of Accounts.
Steps
-
In the top navigation bar, click the Settings menu (the gear icon, top right), then click Settings.
-
On the Settings page, click the Chart of Accounts tile.
-
Click Add Account (top right).
-
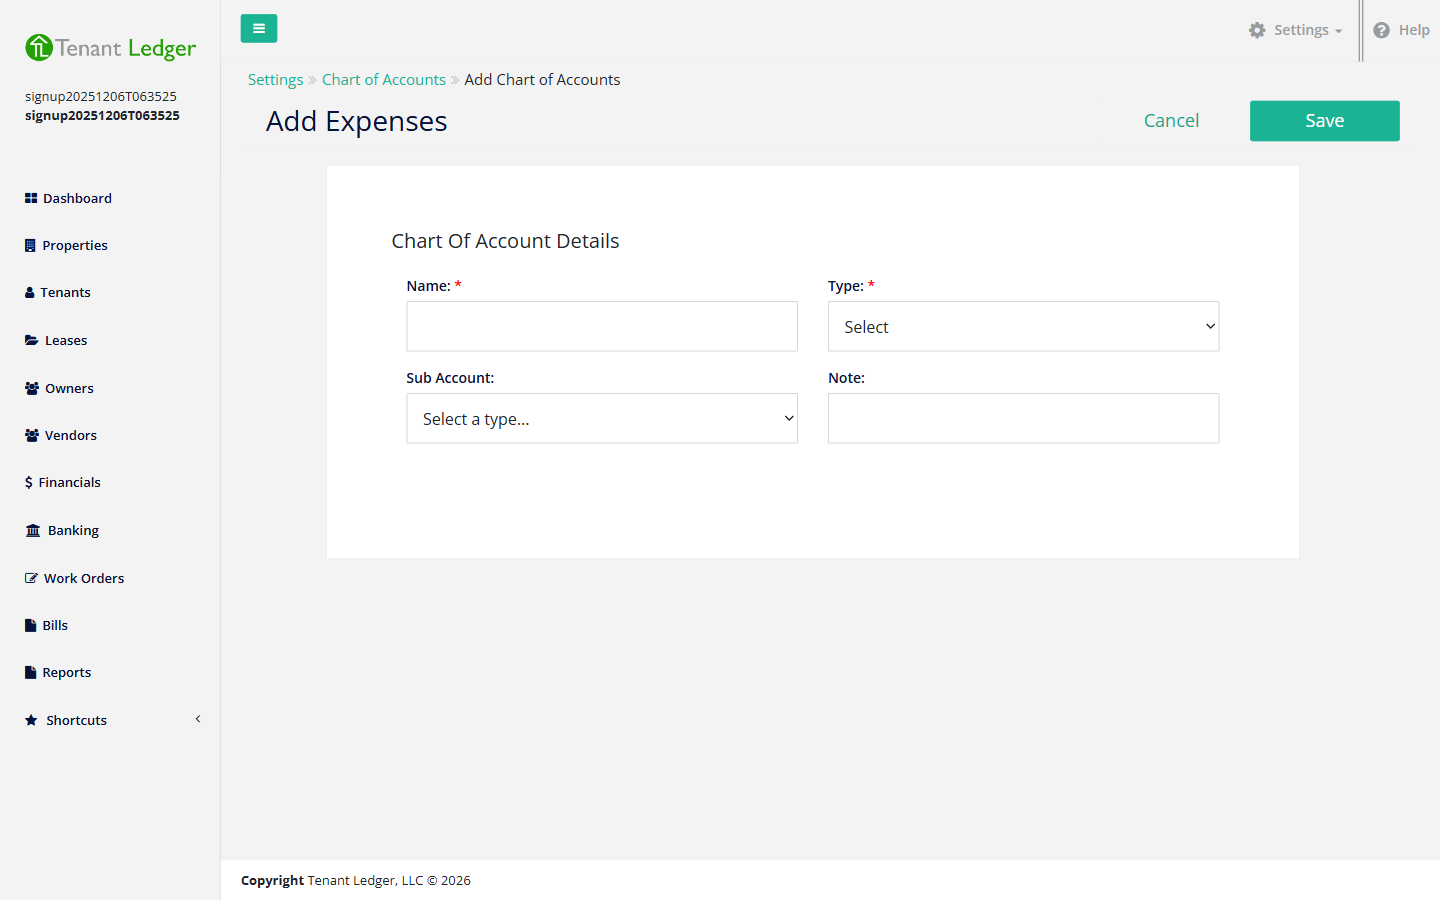
Fill in the details for the new sub-account:
- Name (required) — the name of the sub-account, for example “Plumbing”.
- Type (required) — the account type, for example Expenses.
- Sub Account — open this dropdown and choose the parent account you want to nest this one under (for example “Repairs”).
- Note (optional).
-
Click Save.
What you’ll see
On the Chart of Accounts list, the new entry shows as “Parent - Sub-account” (for example, “Repairs - Plumbing”), so you can tell at a glance how it’s grouped.
Tips
- The Sub Account dropdown only lists accounts that are eligible to act as parents. If you don’t see the parent you expect, confirm it was created first.
- You can leave Sub Account blank at any time to create a normal top-level account instead.
Related articles
Still stuck? Email support@tenantledger.com and a real person who knows the product will help.