
Set up your Chart of Accounts
What this is
Your Chart of Accounts is the list of categories you use to label money coming in and going out — for example “Rent Income”, “Late Fees”, “Plumbing Repairs”, or “Insurance”. Every charge, payment, and bill you record is tagged with one of these accounts, and your financial reports (like Income Statement and Cash Flow) are built by grouping transactions by account.
When to use it: set up your accounts once when you start, then add new ones any time you need a new income or expense category. Good account names now mean clean, readable reports later.
Before you start
- None. Your account comes with a set of standard accounts already in place (such as Rent Income and Prepaid Rent), so you can start working right away. You only add accounts when you want a category that isn’t already there.
Steps
-
In the top navigation bar, click the Settings menu (the gear icon, top right), then click Settings.
-
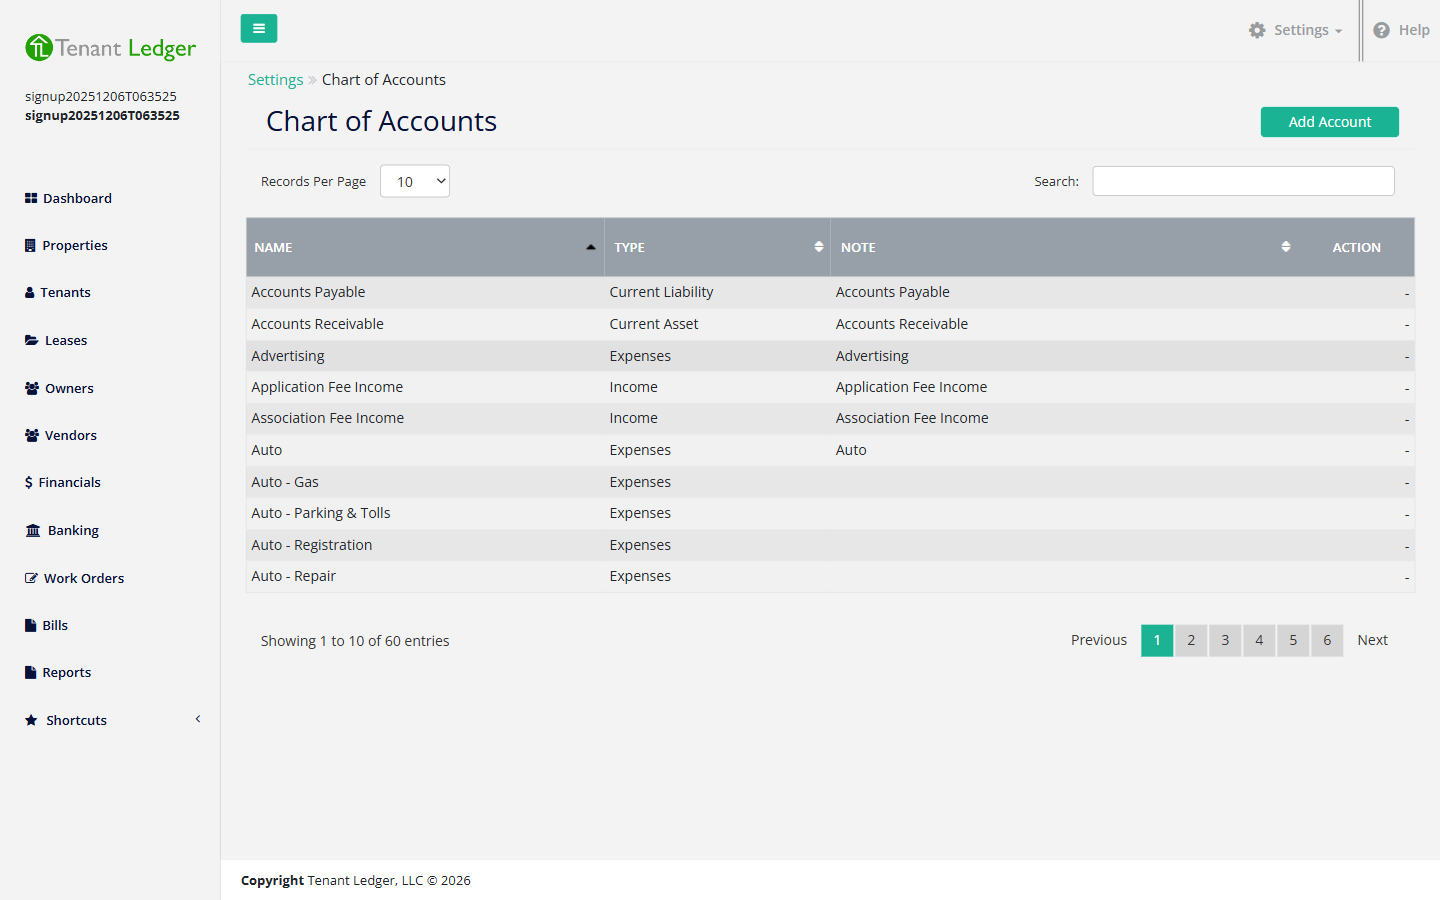
On the Settings page, click the Chart of Accounts tile. You’ll see a list of every account you already have, showing its Name, Type, and Note.
-
Click Add Account (top right). If you have no accounts yet, click Add Your First Account in the center of the page instead.
-
Fill in the account details. Here’s what each one means and how to choose:
-
Name (required) — what you’ll call the account when tagging a charge or bill, for example “Rent Income” or “Plumbing Repairs”. Use a name you’ll recognize in a dropdown and on a report.
-
Type (required) — the kind of money this account tracks. Choose:
- Income — money you collect (rent, fees, parking). Pick this for anything a tenant or owner pays you.
- Expenses — money you spend (repairs, utilities, insurance). Pick this for bills and costs.
- Current Asset (cash) — things of value you hold, such as a cash or clearing account. Most users won’t need to add these.
- Current Liability — money you owe or hold on someone’s behalf, such as a deposit you’re holding.
- Equity — owner’s stake. Rarely added manually.
For everyday use you’ll almost always pick Income or Expenses.
-
Sub Account (optional) — leave this as “Select a type…” to create a normal, top-level account. To nest this account under an existing one (for example, “Plumbing” under “Repairs”), see Add a sub-account.
-
Note (optional) — a short description for your own reference, such as “Used for all routine maintenance”. This shows in the Note column on the list.
-
-
Click Save.
What you’ll see
You’re returned to the Chart of Accounts list, where your new account now appears with its name, type, and note. It’s immediately available to select whenever you create a charge, record a payment, or enter a bill.
Tips
- Use clear, consistent names so reports are easy to read at a glance — “Plumbing Repairs” is better than “Plumb”.
- Some standard accounts are protected: they show a dash (—) in the Action column instead of Edit/Delete buttons. That’s normal — these are built-in accounts the system needs and you can’t change or remove them.
- Once an account has been used by a charge, payment, or bill, it can no longer be deleted until you remove or reassign those records. See Delete a Chart of Accounts account.
Related articles
Still stuck? Email support@tenantledger.com and a real person who knows the product will help.