
Create a lease (link a tenant to a unit and set rent and deposit)
What a lease is
A lease is the record that connects one or more tenants to a unit and sets the financial terms: the rent amount, the start and end dates, the security deposit, and any charges that should bill automatically. Almost everything else in TenantLedger hangs off the lease — rent charges, payments, credits, refunds, and the tenant statement all live under it.
Create a lease when a tenant (or a group of co-tenants) is taking a unit. It’s the starting point: until the lease exists, there’s nothing to bill rent against or record payments toward. You can set up the rent schedule and deposit while you create the lease, or add them afterward from the Lease Summary page.
Before you start
- Add the property and at least one unit for it (you can also add a unit from inside the lease form using the plus icon next to the Unit field).
- Add the tenant(s) you want to place on the lease (you can also add a tenant from inside the lease form using the plus icon next to the Tenant field).
Steps
-
In the left sidebar, click Leases.
-
On the Leases list, click the + Lease button in the top-right corner.
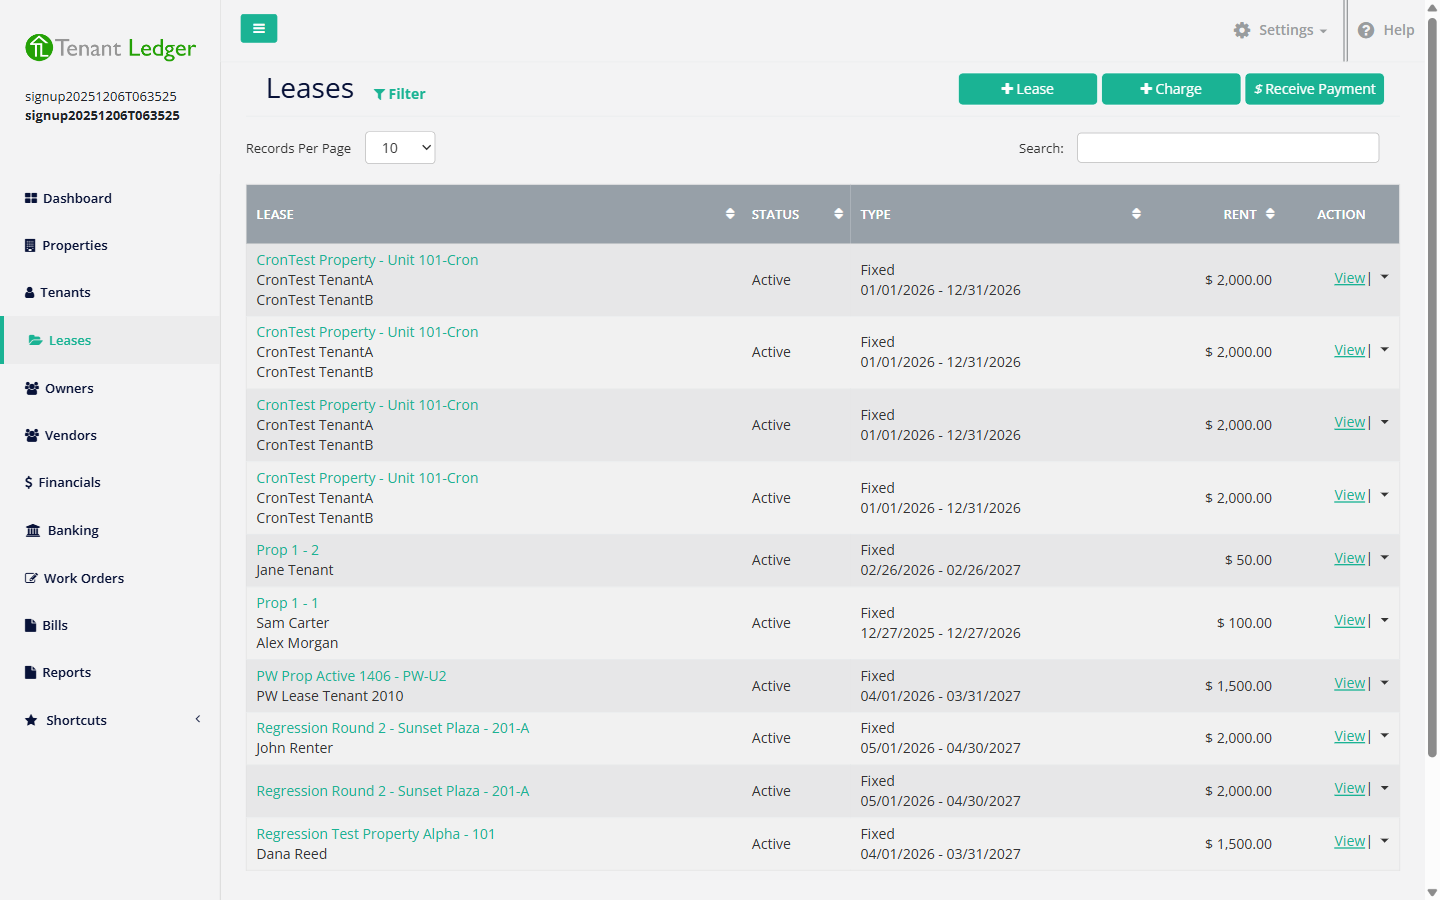
-
Under Lease Details, choose the Property, then choose the Unit. The Unit list only shows units that belong to the property you picked. If the unit does not exist yet, click the plus icon next to the Unit field to add it without leaving the form.
-
In the Tenant(s) field, start typing a name and select each tenant on the lease. Add as many as you need for a shared lease. To create a brand-new tenant on the spot, click the plus icon next to the field.
-
Set the lease terms:
- Lease Status — choose Active for a lease that is in effect now, Future for one that starts later, or Terminated for a lease that has already ended (you normally pick Active or Future when creating).
- Lease Type — choose Fixed for a lease with a firm end date, or At Will for a month-to-month arrangement.
- Lease Start Date and Lease End Date — the term of the lease. The End Date must be after the Start Date.
-
Choose whether to Automatically End Lease on the end date:
- Yes — the lease is marked Terminated automatically when the end date passes.
- No — the lease stays Active past the end date until you end it yourself (common for month-to-month).
-
Under Charge Details, choose the Payment Responsibility. This decides who owes the rent:
- Individual Responsibility — one main tenant is responsible for the rent. You’ll then pick the Main Tenant Responsibility below.
- Multiple Responsibility — the rent is owed by the lease as a whole, shared across the co-tenants, rather than billed to one named person. Choose this for true shared/roommate leases.
-
Enter the Rent Amount. If you chose Individual Responsibility, also pick the Main Tenant Responsibility (the person the rent charges are billed to).
-
(Optional) Turn on any of the charge panels by checking the box at the top of each one. Each panel you leave unchecked is simply skipped:
- Recurring Rent Charges — automatically bills the rent on a schedule so you never have to enter it by hand. Set the Start Date, End Date, and Frequency (Weekly, Monthly, Quarterly, or Yearly). It uses the Rent Amount you entered above. (See Set up recurring charges on a lease.)
- Late Fee Charge — sets a late fee amount and a grace period (the number of days after the due date before the fee applies).
- Deposit Charge — bills a security deposit. Choose whether it is paid by a single tenant or split across multiple tenants, then set the due date and amount. This creates a charge for the deposit, which the tenant then pays like any other charge.
- Additional Charges — adds one-time charges (for example, a pet fee or a key fee) due on a specific date.
-
Click Save in the top-right corner.
What you’ll see
After saving, you land on the Lease Summary page for the new lease. It shows the property, unit, the tenants and their move-in dates, the rent amount, and any recurring charges, deposits, or additional charges you set up. The lease now appears in the Leases list, and its charges appear on the Financials tab.
Tips
- You don’t have to set up recurring rent, late fees, or deposits while creating the lease — you can add them later from the Lease Summary page (Financials tab).
- The End Date must be after the Start Date, or the form shows a validation error and won’t save.
- A charge billed to the whole lease (Multiple Responsibility) is owed by the group, not one named tenant. Use Individual Responsibility when only one person should be billed.
- Use clear, generic names for example tenants and properties (for example, “Riverside Apartments”, “Unit 101”, “Jane Tenant”).
Related articles
Still stuck? Email support@tenantledger.com and a real person who knows the product will help.