
Add a bill (vendor invoice)
A bill records money you owe a vendor — a plumber’s invoice, a utility statement, a landscaper’s monthly charge, and so on. Entering the bill now (before you pay it) lets you track what’s due, split the expense across categories, and pay it later by check, cash, or EFT.
When to use it: enter a bill whenever you receive an invoice you intend to pay through TenantLedger. If the same charge arrives on a fixed schedule for the same amount, set it up once as a recurring bill instead of re-entering it each time. See Set up a recurring bill.
Before you start
- You need a property to assign the bill to. If you haven’t added one yet, do that first in your Properties section.
- You need the vendor. You can add a new vendor on the fly from the bill screen if it isn’t in your list yet.
Steps
-
Open the Add Bill screen one of two ways:
- In the left sidebar, open the Shortcuts group and click Add Bill, or
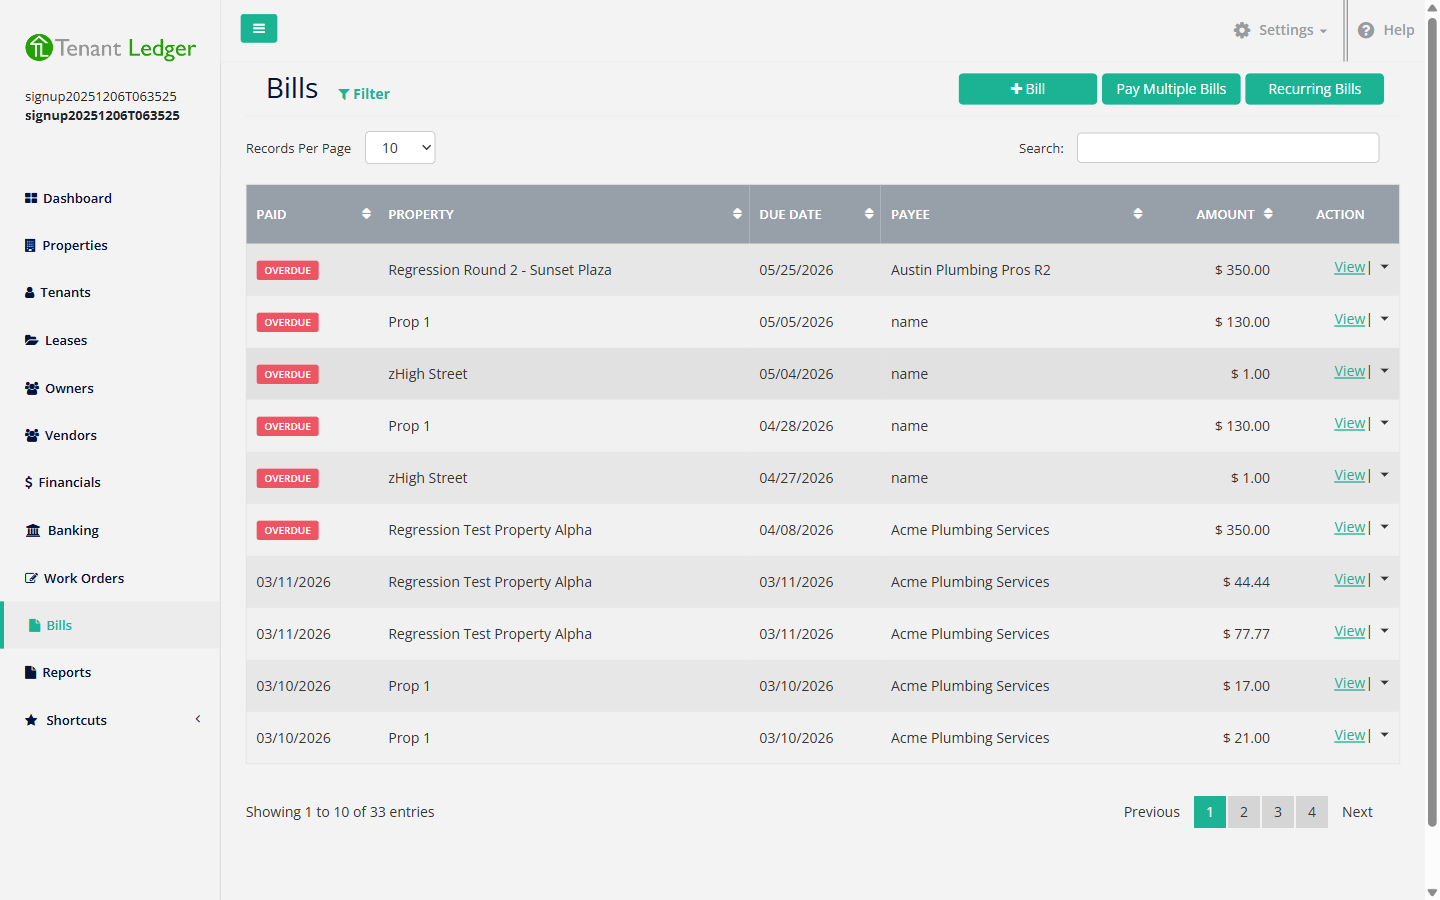
- Click Bills in the left sidebar, then click the add-bill button.
-
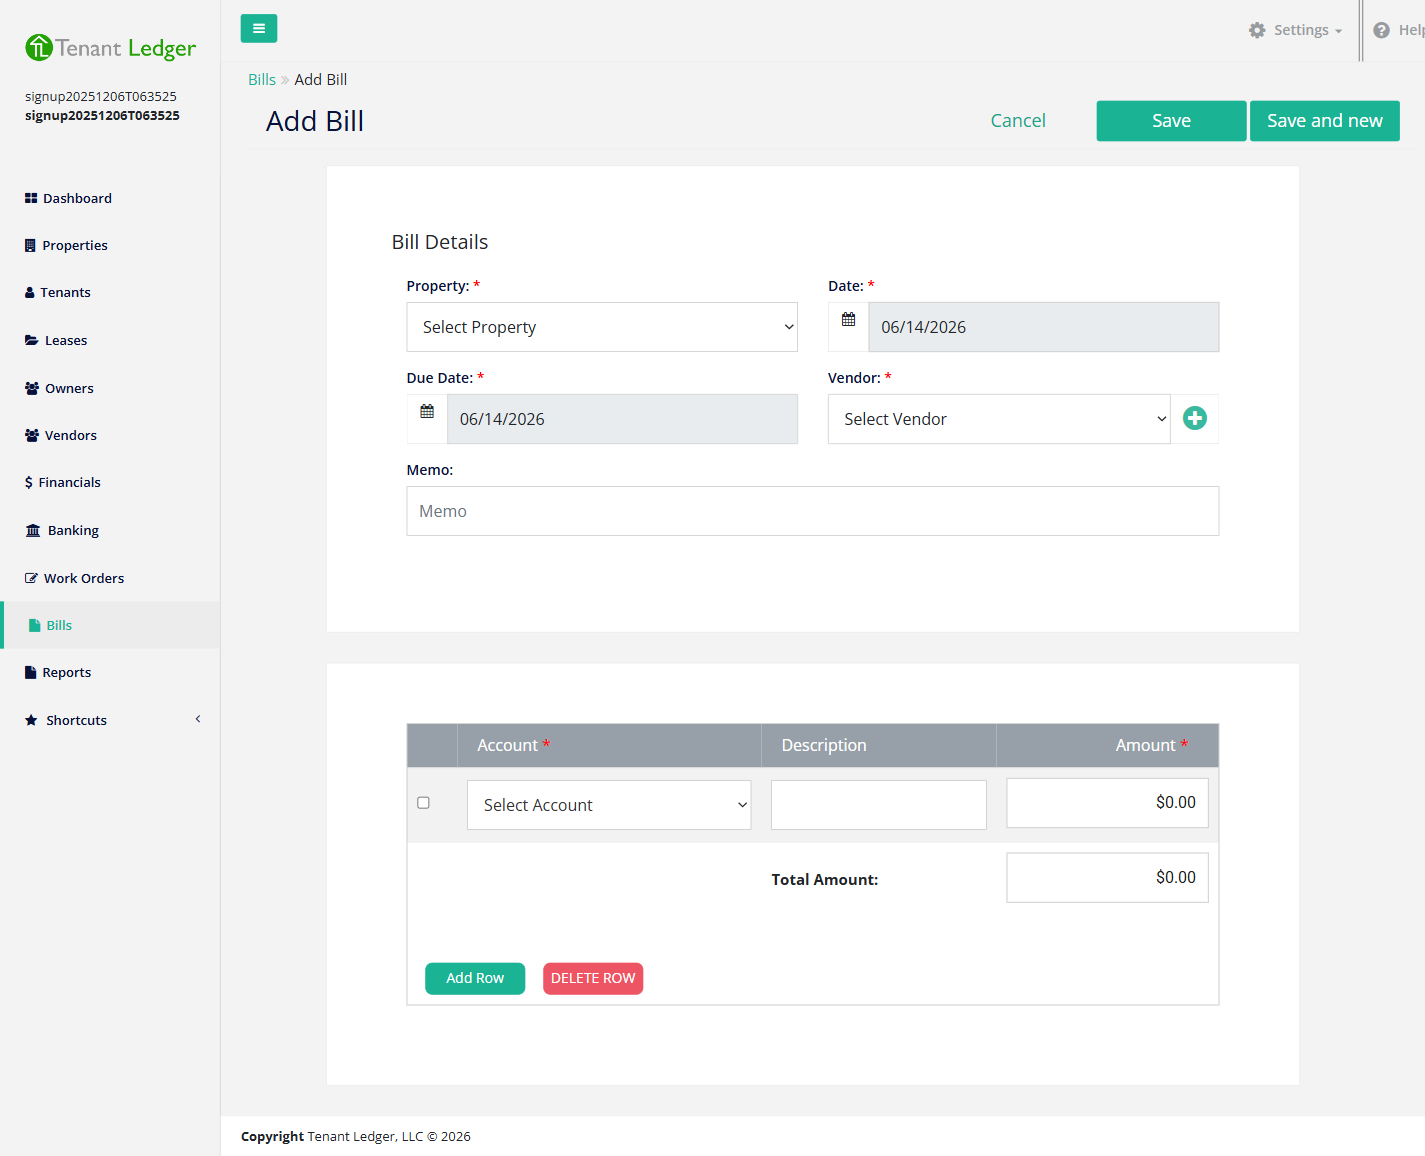
Fill in the Bill Details:
- Property (required) — the property this bill belongs to. The bill’s expense is tracked against this property’s books.
- Date (required) — the bill or invoice date (defaults to today).
- Due Date (required) — when the bill is due (defaults to today). The Bills list uses this to flag a bill as OVERDUE once the date passes.
- Vendor (required) — choose the vendor you owe. To add one that isn’t in your list, click the + next to the dropdown and fill in the vendor pop-up; the new vendor is selected automatically.
- Memo — an optional note about the bill (for example an invoice number).
-
In the line-item table, enter each expense line:
- Account (required) — the expense category this line belongs to, for example “Repairs & Maintenance” or “Utilities”. This is what drives your expense reports, so pick the category that best describes the cost.
- Description — optional detail for the line.
- Amount (required) — the amount for that line.
-
To split the bill across more than one category, click Add Row and enter another line (for example, part to “Plumbing” and part to “Appliances”). Use Delete Row to remove a line. The Total Amount at the bottom updates automatically as you type.
-
Click Save, or click Save and new to save this bill and immediately start another for the same property.
What you’ll see
You land on the bill’s Summary page showing the vendor, property, due date, line items, and total. The bill now appears on the Bills list marked DUE (or OVERDUE if past its due date) until it’s paid. From the Summary page’s Actions menu you can pay the bill, edit it, or delete it.
Tips
- The total is calculated from the line items, so you don’t type it directly — just enter each line’s amount.
- If the same bill comes in every month for the same amount, set it up once as a recurring bill instead of re-entering it. See Set up a recurring bill.
Related articles
Still stuck? Email support@tenantledger.com and a real person who knows the product will help.