
Set up a recurring bill
A recurring bill is a template for an expense that arrives on a regular schedule for the same vendor and amount — monthly landscaping, a quarterly insurance premium, a yearly license fee. Instead of re-entering the bill each time, you define it once and TenantLedger generates the actual bill for you on the schedule you set.
When to use it: set up a recurring bill for any predictable, repeating expense. Each time the schedule comes due, a normal bill is created and appears on your Bills list, ready to pay like any other.
Before you start
- You need the property and vendor for the bill. (Vendors are added from your Vendors section.)
- Decide the schedule: how often it repeats, when it starts, and when it should stop.
Steps
-
In the left sidebar, click Bills, then open the Recurring Bills page and click Add Recurring Bill.
-
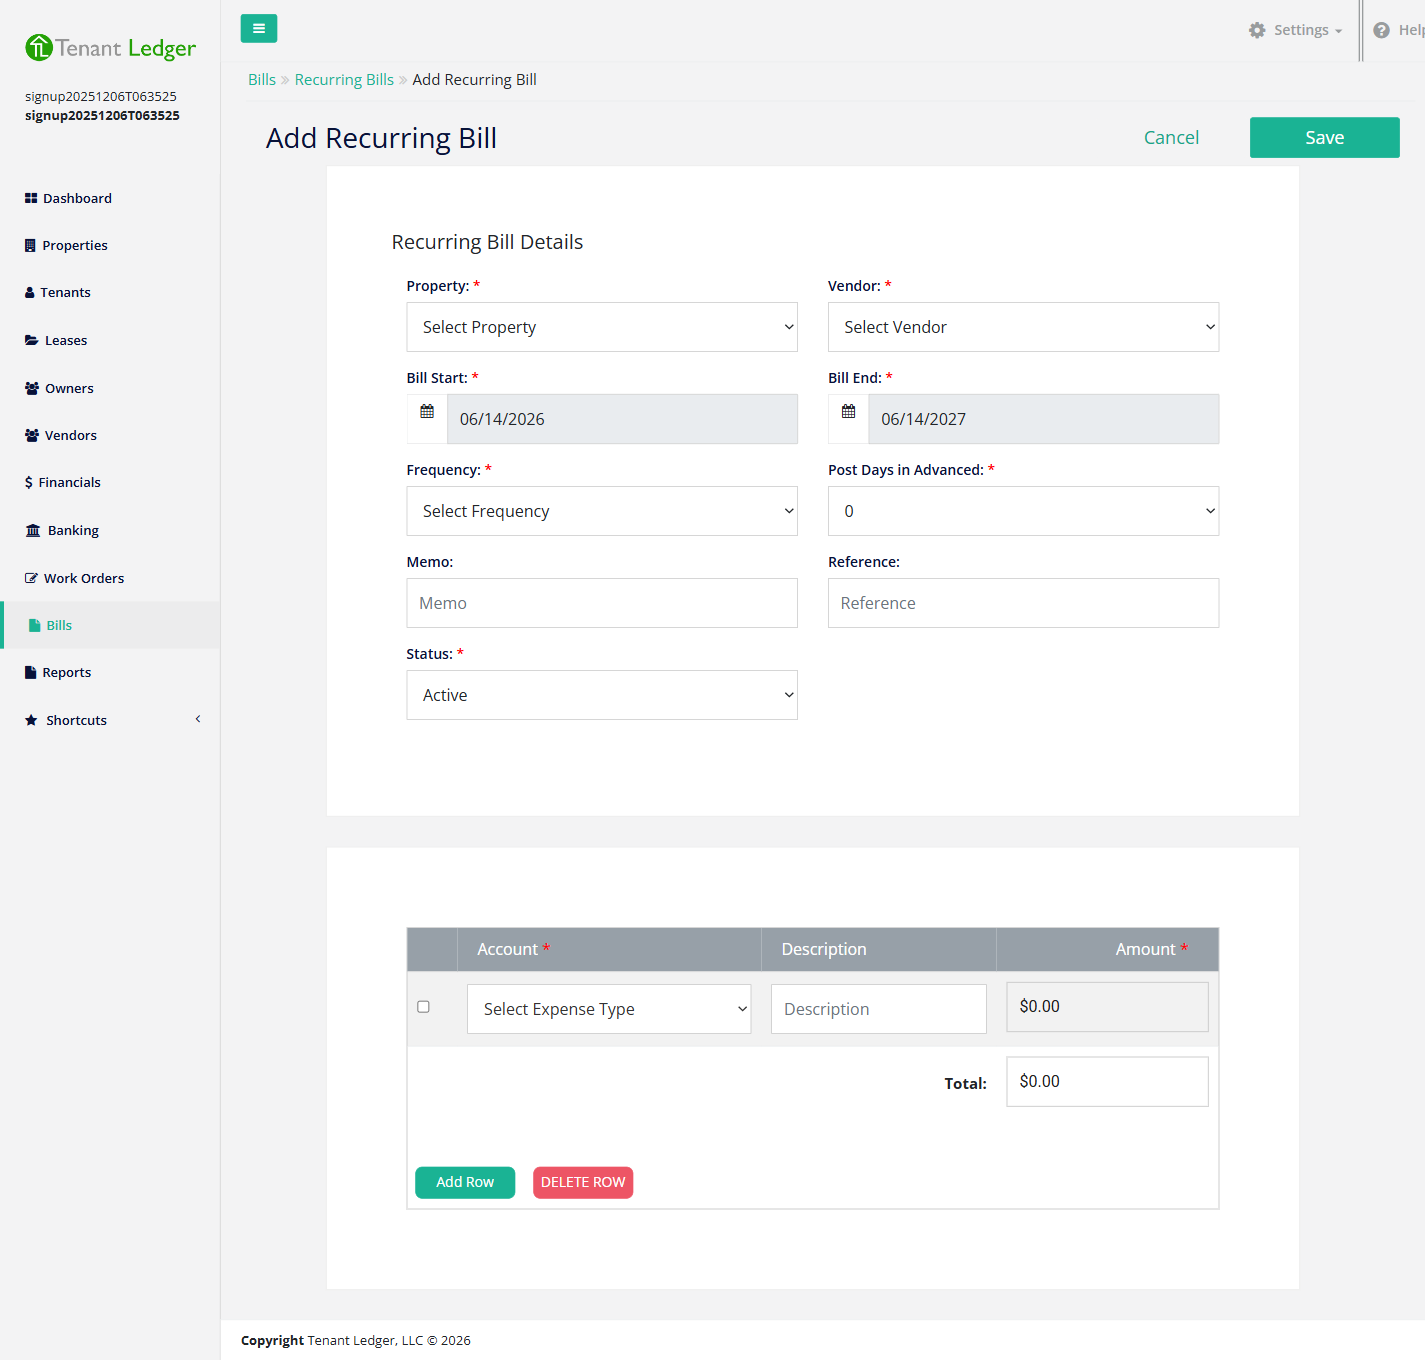
Fill in the Recurring Bill Details:
- Property (required) — the property the generated bills belong to.
- Vendor (required) — the vendor you’ll owe each time.
- Bill Start (required) — the first date a bill should generate from this template.
- Bill End (required) — when the recurrence should stop (defaults to one year out). No bills generate after this date.
- Frequency (required) — how often the bill repeats: Weekly, Monthly, Quarterly, or Yearly.
- Post Days in Advanced (required) — how many days before the due date the bill should be created, so it shows up on your Bills list with enough lead time to schedule payment.
- Memo and Reference — optional notes carried onto each generated bill.
- Status (required) — leave as Active to keep it generating. Setting it to Inactive later pauses it without losing the setup.
-
In the line-item table, enter each expense line just like a normal bill: an Account (expense category), a Description, and an Amount. Click Add Row if the bill splits across more than one category.
-
Click Save.
What you’ll see
You land on the recurring bill’s Summary page showing the schedule and line items, with a confirmation that it was added. The template now appears on the Recurring Bills page. On the schedule you set, TenantLedger creates a regular bill that appears on your Bills list, ready to pay.
Tips
- Setting up a recurring bill does not pay it. Each generated bill still needs to be paid like any other. See Pay a bill.
- To pause a recurring bill without losing the setup, edit it and set Status to Inactive. See Edit a recurring bill.
- Use Post Days in Advanced so the bill appears with enough time to schedule payment before it’s due.
Related articles
Still stuck? Email support@tenantledger.com and a real person who knows the product will help.