
Print a check
When you pay a bill (or several bills) by check and choose to print it, TenantLedger generates a printable PDF check that you can run through your printer onto check stock. The check shows the payee, amount, date, check number, and the bill detail on the voucher.
When to use it: any time you pay a vendor by check and want the app to produce the physical check, rather than writing it by hand. You can also re-print a check later if a print job fails or you need another copy.
Before you start
- The bank account you’re paying from must have check printing set up. Edit the bank account and make sure its Check Layout is set to something other than None, and that the account number, routing number, fractional number, and next check number are filled in. See Edit a bank account.
- You must have a recorded bill payment that was made by check with Print Check set to Yes.
Steps
-
Pay a bill by check and choose Yes for Print Check. See Pay a bill or Pay multiple bills at once.
-
After the payment is saved, TenantLedger opens the check PDF in a new browser tab.
-
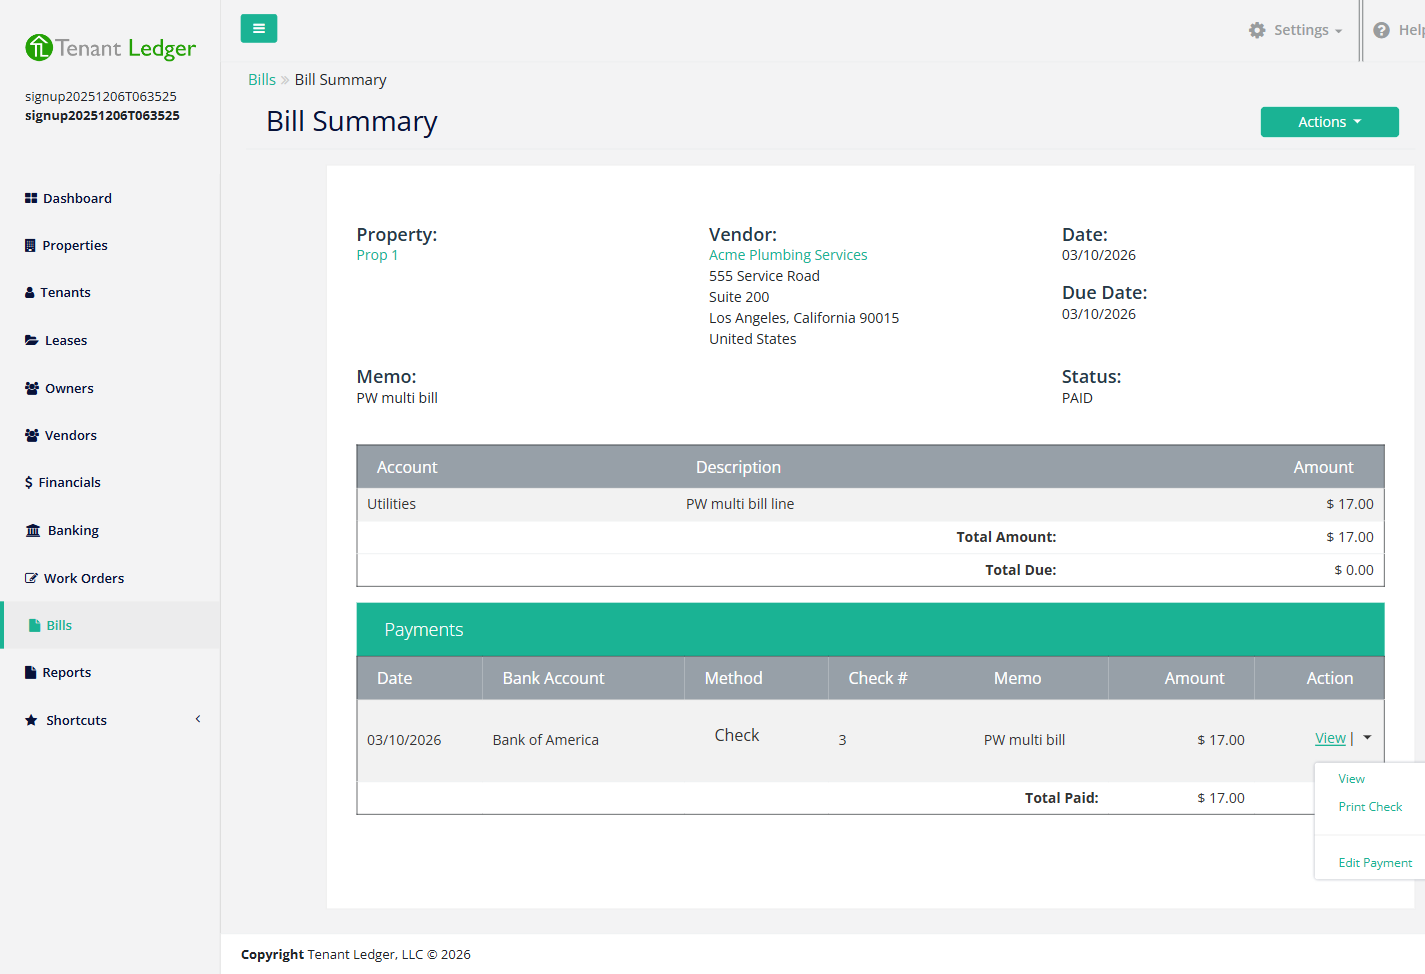
To re-print a check later, open the bill: click Bills in the left sidebar, open the bill’s Summary, find the payment in the Payments list, click the Action dropdown next to it, and choose Print Check.
-
The check opens as a PDF in a new tab. Load your check stock into your printer and print the PDF.
What you’ll see
A PDF check opens showing the payee, amount, date, check number, and memo/voucher detail laid out for your selected check layout and stock style. Each printed check uses the bank account’s next check number, which then advances automatically for the next check.
Tips
- If you see a message that “Check printing is not configured for this bank account,” edit the bank account and choose a Check Layout other than None. See Edit a bank account.
- The check layouts follow standard U.S. check stock formats, so they line up with common pre-printed and blank check stock.
- Print a test check on plain paper first and hold it up against your check stock to confirm the alignment before printing on real checks.
Related articles
Still stuck? Email support@tenantledger.com and a real person who knows the product will help.